—Opening Narration
Grima (Evil Dragon Gimurei in the Japanese version) is the Final Chapter (a.k.a. "Endgame") of Fire Emblem: Awakening.
Script
The script for this chapter can be found here.
Strategy
Subjective: The following part of this article is based upon the editor's personal experiences and opinions, and therefore may not be applicable for all readers.
|
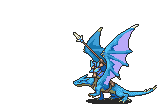
This battle takes place atop the Fell Dragon's back, with the Grima-controlled Avatar resting on the other side. To win this battle, you must be able to defeat Grima as quickly as possible. As long as Grima stays alive, Grimleal reinforcements will keep coming on the field via Sigil panels every turn, which can wear down even your toughest units. The enemy's weapons are always the same, including reinforcements, so be wary of Assassins and Falcon Knights if any appear from the sigils. When they spawn is also affected by difficulty; when playing on Normal, Grimleal reinforcements arrive after Grima ends her turn, while on Hard and above, they will spawn at the beginning of her turn.
The key to clearing this map is survivability and how quickly your units can kill enemies before they can damage them or how sturdy they are to take many hits. At the start of the map, it is best to move all units into the "safe area" that can be displayed by checking the enemy movement range. This area will allow you a turn to plan out your strategy to take down Grima. From the second turn onwards, your units will have almost no area outside of the enemies' range.
Grima has a different setup for his final defenses on the northern end of the map depending on the difficulty. On Normal, Grima will have no enemies guarding him so you are free to attack him at any time. On Hard Mode and above, Grima now has a full wall of 4 Generals and 3 Berserkers meaning that you will need to dispatch at least one in order to engage Grima without using a Longbow wielding Sniper or a Mire wielding Sorcerer. These 7 units will not move out of their spots so you will need to engage them inside of Grima's attack zone. If you defeat one of the wall enemies, you can immediately attack Grima at will, however it is best to deal with the entire wall to avoid taking as much hits as possible from those units.
As the final boss, Grima is extremely sturdy and hits hard. He will not move from his spot at the top of the map, but he has a massive range of 5. His stats rise with the difficulty and he gains new skills. Regardless of difficulty, Grima will always have Dragonskin equipped which halves all damage dealt to Grima and negates the usage of Counter and Lethality. He also has Anathema to lower your units hit and dodge rate, but for the most part, this skill is less dangerous compared to the other ones he gets. On Hard mode, Grima gains the Ignis skill which will add half of his impressive Magic stat to his strength which can prove fatal if it activates as well as Pavise to shave off damage from any direct physical weapons and Taguel attacks. Lunatic finally adds Rightful God which increases the activation of his Ignis and Pavise skills up to 80% which means that he'll activate Ignis and Pavise almost every time. There is hope, however, because he is extremely vulnerable to Chrom's Exalted Falchion and Lucina's Parallel Falchion so those two will prove to be valuable when taking him down on all difficulties. Secondly, he still a little more vulnerable to magic since Pavise does not activate against Tomes as well as Bows and Manakete attacks, but this only applies from Hard mode and above. On Normal and Hard, capped allies will not have any difficulties dealing massive damage or taking damage from Grima and his allies, but this usability against Grima becomes largely diminished once Lunatic and Lunatic+ comes into play.
Once Grima is defeated, you will be offered the option to either have Chrom seal Grima using the Exalted Falchion, or have the Avatar kill Grima.
NOTE: All Experience, Level, Promotion, Reclass, Weapon Durability, Skill, Support Points and Stat changes gained will not carry over after this chapter is completed.
Reinforcements
- Four enemy units arrive at the end of the enemy's turn from one sigil area (north-west, top middle, north-east, south-east, top bottom, south-west) areas. The arriving units are the ones in the map.
| Previous chapter: To Slay a God or The Radiant Hero |
Grima (Chapter) | Next chapter: - |

