Located on the Jehanna coast, the Lagdou Ruins allow you to gain new characters once the game has been completed. However, the monsters are much stronger than in the Tower of Valni, making it a huge challenge. There are not as many weak monsters like in the Tower of Valni, but now there are promoted monsters like Gorgons, Cyclops, Wights, Arch Mogalls, Maelduins, and even Draco Zombies. The monsters in here, unlike the Tower of Valni, are much stronger than the floors suggest; although they are individually weak, this is compensated with extremely large amounts of monsters on each floor, ranging from 35-55 on floors 1-9.
It is highly recommended to stock up on weapons of all sorts, including long-range tomes such as Purge to deal with various enemies on each floor, as just like in the Tower of Valni, players will only be able to use the convoy shop which sells low level weapons which may be ineffective against the usually well-armed enemies.
Monsters in here may drop Promotional items, gems, Stat-boosting items, and various moderate level equipment. Brave weaponry may also be obtained here from monsters much more frequently than those in monster skirmishes.
Unlockable Characters
You can unlock these characters after you finish the main story and start the creature campaign:
- Glen - Wyvern Lord: Clear the 5th floor
Lvl 12 Items: Silver Lance, Silver Sword, Blue Gem
Lvl 10 Items: Silver Sword, Silver Bow, White Gem
- Valter - Wyvern Knight: Clear the 7th floor
Lvl 13 Items: Silver Lance, Spear, Fili Shield
Lvl 11 Items: Silver Sword, Silver Lance, Silver Axe, Master Seal
- Lyon - Necromancer: Clear the 10th floor three times
Lvl 14 Items: Naglfar, Physic, Hammerne
Floors
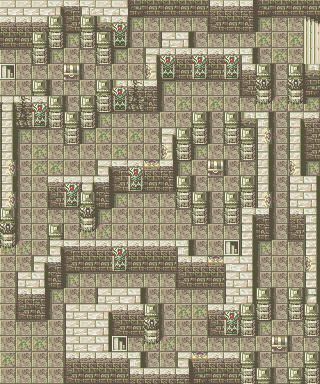
Floor 1
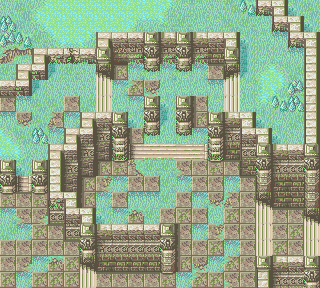
- Units: Cyclops, Gargoyle, Mogall, Wight, Elder Bael, Gwyllgi, Maelduin, Entombed, Revenant, Bael
- Boss: Wight (equipped with Steel Blade and Javelin)
- Chests: None
- Reinforcements: After five turns, behind the boss, two monsters, which include Elder Baels, Maelduins, Gwyllgi or Wights will appear. Wights seem to be the most common monsters that appear.
- Notes: Either a Revenant or an Entombed will be at the bottom central area. The bottom left area contains any three of the "unpromoted" units (not including the Revenant if it appears).
Floor 2
- Units: Bonewalker, Wight, Cyclops, Maelduin, Elder Bael, Gwyllgi
- Boss: Cyclops
- Chests: None
- Note: This floor contains a large number of Cyclops and Maelduin. Utilizing magic users or axereavers will be effective against them. Another possible strategy would be using units with high defense, since there are no enemy magic users. There is also a cracked wall near some Wights west of the boss. The Bonewalker nearby will destroy the wall when the player moves units "over" a line.
Floor 3
- Units: Gorgon, Maelduin, Elder Bael, Gwyllgi, Wight
- Boss: Wight (Drops a Blue Gem, equipped with Runesword and Steel Blade)
- Chests: Three; one in top-left, holding a C-rank tome or a Red/Blue/White Gem, one in top-right, holding 3000 gold, and one in the middle-right; holding the Steel series (with Steel Blade) or a Red/Blue/White Gem. The top-right chest is guarded by a Wight with a droppable Chest Key so two will be sufficient to open all the chests unless a Rogue is brought in.
- Notes: Longbows will be effective against the Gorgons as each one has Stone. In three of these "rooms" (in the central left, upper left and right) contains one Gorgon with Demon Surge and Stone, along with three other monsters, usually Gwyllgi, but can have Maelduins or Elder Baels also. The middle "room" contains one Gorgon while the right room has two Gorgons. The first three Wights that spawn are passive and their only role is to open the doors, so it is recommended to use a long-range tome against them to kill them before they do so. If they do get released, fall down to bottom right area to funnel the incoming monsters with a unit with high DEF while you use support units to kill other monsters and the Gorgons.
- Reinforcements: At turn two, one Wight will appear on the bottom left area and another at the corridor above the bottom right area. They have a door key and will use it to open one of the doors in the map, which will release various monsters inside. Kill them or steal the door keys to prevent this. At turn three, one more Wight will spawn near the central-western part of the map and will open the other door. Afterwards, Wights will spawn near the stairs; starting turn 3 for four turns at the stairwell and turn 5 for four turns for the north passage.
Floor 4
- Units: Gorgon, Maelduin, Elder Bael, Gwyllgi, Wight, Thieves
- Boss: Gwyllgi
- Chests: One in upper right - holds the series of Killer weapons, and one at lower left; holds the anti weapon series.
- Notes: Floor reminiscent of the Tower of Valni Level 6; the starting position and boss location is swapped. Gorgons are randomly equipped with Stone and Shadowshot. Monsters do not destroy the walls but at least 2-3 monsters are inside each "room".
- Reinforcements: Thief at middle-right staircase on Turn 3, thief on lower-right staircase on Turns 8 and 9. After pilfering the chest, they will run to a staircase near the chests to leave the map.
Floor 5
- Units: Maelduin, Cyclops, Elder Bael, possibly Gorgon, Entombed, Gwyllgi, Thieves
- Boss: Maelduin (drops a White Gem)
- Chests: Three; bottom right; holds selection of staves, (Mend, Rescue, Silence, Fortify, Physic, Restore), middle; holds the Silver series of weapons, top left; holds C rank and A rank tomes.
- Notes: Ornate wall decorations/broken-like walls shoot out poisonous gas up to 3 squares; deals 1-3 damage and also inflicts the Poison status on the affected units. They can stack up depending on the location and being hit again restarts the Poison status. The Cyclops are passive and do not move from their spot, even if they can reach the target and will only attack if one of your units is next to it. The enemy units will not die from terrain death; they are all placed away from the poison gas. Starting from this level, Cyclops units may have 80+ HP on deeper floors.
- Reinforcements: Thief will appear from the bottom stairwell at end of turn 1 (this Thief will outpace any attempts to race him to the chest; can only be stopped using a 3-10 range magic tome or given a dance from Tethys, another will appear on end of turn three at the middle stairwell, and a third at the top left stairwell at end of turn 7; both can hit the chest on their first movement. It should be noted that they drop the pilfered items upon being defeated. The third Thief always drops his Lockpicks.
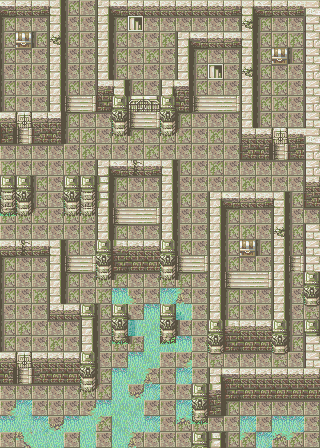
Floor 6
- Units: Elder Bael, Wight, Gorgon, Cyclops, Arch Mogall, Maelduin.
- Boss: Elder Bael
- Chests: None
- Notes: Forces begin split between three corridors, in groups of three, three and four. On the left side are two Gorgons, an Arch Mogall with Shadowshot, a Cyclops and one random unit, usually a Wight or Maelduin. The left side contains mainly bow using Wights a Gorgon, and like the other side near the starting positions, a random unit. All of the Gorgons only have Stone. The middle of the room mainly contains Elder Baels, with the end of the room containing Wights. Units on the left side need to break a wall, while those on the right side may also destroy a wall there or open the door instead. Strong units should be placed in the middle due to the threat of Elder Baels and enemy reinforcements on the later turns.
- Reinforcements: At the two stairwells at the top, two enemies will appear at turn three. Happens three times. They will be Wights, Arch Mogalls (may have Shadowshot), Elder Baels or Maelduins.
Floor 7
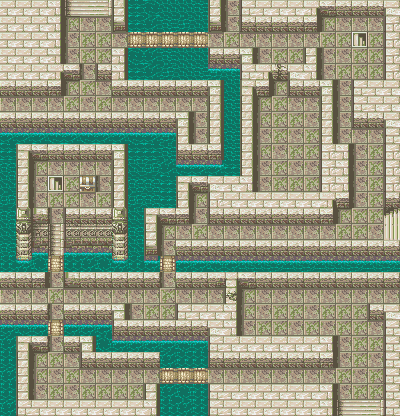
- Units: Gorgon, Wight, may include Gwyllgi, Arch Mogall, Deathgoyle.
- Boss: Gorgon (drops a Black Gem)
- Chests: One chest in the middle-left, holds White, Blue or Red Gem.
- Notes: Again forces are split, four in the top corridor, four in the middle, three on the bottom left. One of the enemies may have a Shadowshot.
- Reinforcements: Units from the top staircase begin appearing end of turn two and three, followed by units at the top left corridor, and top middle corridor at turn three and four, the chestside stairwell and turns three, four and five, then a unit at the bottom-left corridor turns four, one at the right staircase for turns four and five, one unit at the top-right staircase turn eight and nine, one from the bottom-right corridor turn 23, 24, 25, and finally one from the bottom staircase turn 29-34 (either one Arch Mogall, Gwyllgi or Elder Bael)
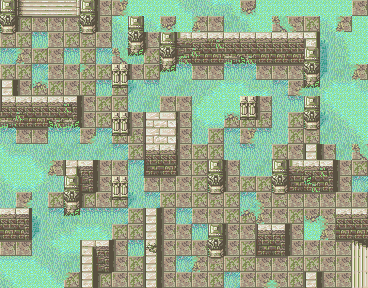
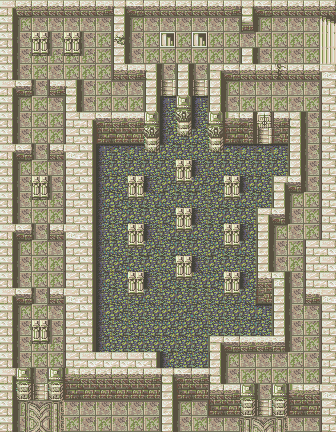
Floor 8
- Units: Deathgoyle, Cyclops, Arch Mogall, Maelduin, occasional Gwyllgi, occasional Entombed
- Boss: Deathgoyle (equipped with Brave Lance and Javelin)
- Chests: One north of the starting position; contains anti-Dragon series of weapons, guarded either by a Cyclops or Entombed.
- Notes: Platforms sporadically appear and disappear over the water to allow for ground access; ground units trapped on water cannot move unless adjacent to an 'island'. After turn 20 the platforms no longer vanish, leaving full access to all units. Aerial units highly recommended due to the large numbers of Deathgoyles and Arch Mogalls. Units on the top left corner do not move unless they can attack your units. The two Arch Mogalls near the staircase on the bottom right do not move at all.
- Reinforcements: End of turn 8 and 9, units appear from the stairwell on the bottom right. At the passage above, two units appear from turn 13 and 14, and the center stairwell produces one unit turn 14 and 15, all Cyclops. Turn 15, 16, 17 and 18 a unit appears on the top right at the staircase.
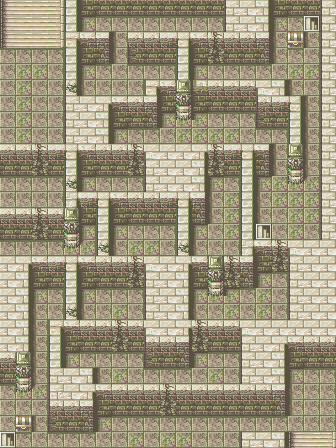
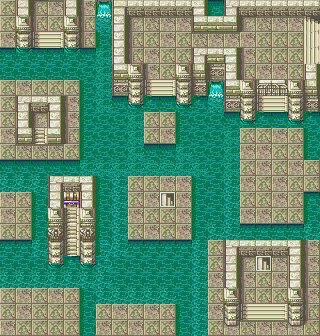
Floor 9
- Units: Wight, Cyclops, Arch Mogall, Maelduin, Entombed (very rare)
- Boss: Cyclops (equipped with Brave Axe and Tomahawk)
- Chests: None
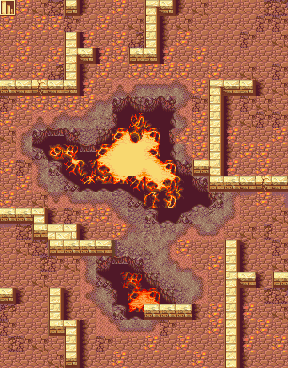
- Notes: Red-dotted tiles signify fiery traps, dealing 10 damage to any unit standing upon them. The AI will not consciously avoid them, which leads to the occasional terrain-death when a distant, passive enemy is placed upon a fire trap. All Arch Mogalls have Shadowshot and will stay in their spot, protected by red tiles, refusing to attack your units unless in range (they will not move to reach a target with their Shadowshot/Crimson Eye). A Maelduin near the boss always carries a Brave Bow. The enemy control glitch can be performed at this level.
- Reinforcements: At turn 27, enemies appear from the stairs in the top-left corner, and will appear again when the unit brought in moves.
Floor 10
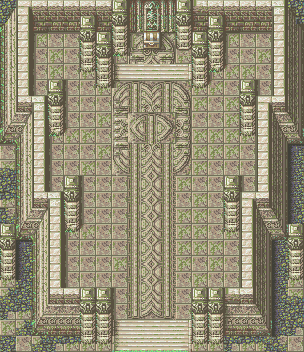
- Units: Draco Zombie
- Boss: Draco Zombie (always drops a Gold Gem)
- Chests: One; there is a 90% of getting a White Gem and 10% chance of getting a Member Card.
- Notes: Draco Zombies are weak to any type of Bows, Bishops, Dragon Slayer weapons, and Sacred weapons. However, they make up for this with an extremely large amount of health, damage and high accuracy. There are only 10 Draco Zombies, five on the top (boss included) and five on the bottom. The top five are slightly spread out, while the bottom five three of them are clumped together on the middle. Draco Zombies do not move unless they can attack a target. The boss guards a treasure chest. The top should be dealt with first since the enemy is not spread that far to prevent them from attacking.
Notes
- While on Floor 2, there is a Bonewalker in the small clump of monsters west of the boss. If you hover the cursor onto the Bonewalker, the icon is the same as when fighting Morva as a Draco Zombie. There are also four Cyclops on Floor 9 which also bear the same icon. The icons themselves were used by War Dragons in Fire Emblem: Binding Blade.
- On Floor 6, both the Cyclops and a Wight on Floor 6 drop a Door Key, despite there only being one door on the floor.
- On Floor 8, a Cyclops near the door carries a Door Key. Unless the two monsters guarding the gate move from their spot, the Cyclops will always attempt to unlock the door, even using the bridges that appear to unlock it from behind.
See also Tower of Valni and Melkaen Coast.